Friday, May 23, 2014
Life Cycle of Cleaning...

Just a little something I felt VERY inspired to make today...can you tell what I'm up to this afternoon?
XOXO,
Catherine


Sunday, May 18, 2014
How To Reupholster a Storage Chest-a tutorial!

I live in an apartment now which means I have to be more organized. Every bit of space counts! I decided a while back to start looking for a storage chest to use as a coffee table so my kids wouldn't leave 500 blankets laying around all the time. Unfortunately, they were all pretty expensive or didn't fit my decor. I was so happy one day when someone from my MOPS group posted a photo of one she wanted to sell for $10. SOLD! After buying the fabric and staples I spent about $30 total on this- waaaaay cheaper than brand new, and I love the fabric to boot!
Storage Chest Makeover- an upholstery tutorial
Materials:
-A storage chest (duh)
-2.5 yards of home decor fabric, canvas, or cotton duck fabric (I used the cotton duck from Hobby Lobby. Much cheaper than home decor fabric) ***Tip***Choose a non-directional print! Especially if this is your first attempt at upholstery. No lines to match up!!!
-An electric staple gun (I borrowed one from a friend- trust me, this is MUCH easier than a manual one)
 |
| Blowin' the smoke off my gun. Because I can't help but do something nerdy when I wear my nerd glasses. |
-Sewing machine and matching thread
-Scissors
-Measuring tape
-Screwdriver
Got all your stuff? Good- it's go time!
Step One- Clean up the storage chest as needed and disassemble. I needed a Phillips head screwdriver to take mine apart.
***Two important tips!***
ONE- Take a picture of the way it is assembled up close. It might look self explanatory but those little pieces have to aim the right way and I promise you will forget.
TWO- place the tiny screw and pieces in a baggie and label which side they were on.
 | |
| This is what it looked like before! |
 |
| Now taken apart! |
 | |
| I had plenty of fabric so I gave myself plenty of fabric to work with. You can always trim later!!! |
 | |
| Nice and pretty. |
 |
| Both long sides complete. |
 |
| Stapling along the way. |
 |
| Making it pretty! |
 | |
| There- see how pretty that looks? |
 |
| My lid. Am I done yet? |
Add 2" to the HEIGHT of each side.
Add 1" to the WIDTH of each side.
Don't mess this part up! Measure twice, cut once!

 |
| The four pieces. |


 | |
| A corner of the base to show an example. |
Step Twelve- Remember where all those pieces go? No? Whew- good thing you took those photos and kept the parts divided in baggies! Put it back together, using your fingers to feel for the holes where the screws originally went.
 |
| You need to use a little elbow grease to get the screws through the thick fabric. |
 |
| Stuff it full of blankets and pillows- you KNOW you have too many!!! |
XOXO,
Catherine
Linked up at Coastal Charm! Head over to see more awesome ideas! Also linked at Tutorial Tuesdays at Hope Studios!
Thursday, May 15, 2014

You might think I mean bitter...or discouraged. Maybe you think I walk around looking like Grumpy Cat all day. In reality, this experience has brought me a new appreciation for my amazing friends, my beautiful children, and my family. It has made me worry less about designer brands and highlights and live more with a heart of thankfulness for the things I DO have. Most of all it has strengthened my walk with my Savior! From my observations, when people go through what I've been through (sorry- no details out of respect) you either blame God and run away from Him...or you run straight into His arms and cling so tight that you can't ever let go! I went with the latter!
The verse above is a promise, and it perfectly explains how I want to live.
So please, continue to join me on my journey of crafting, homemaking, cooking, and parenting. And when I throw a little Jesus in the mix, I hope you remember this post and turn to him also when you are going through something tough!
Much love to my readers old and new!
XOXO
Catherine
Wednesday, April 17, 2013
Outdoor Play Challenge, part 1
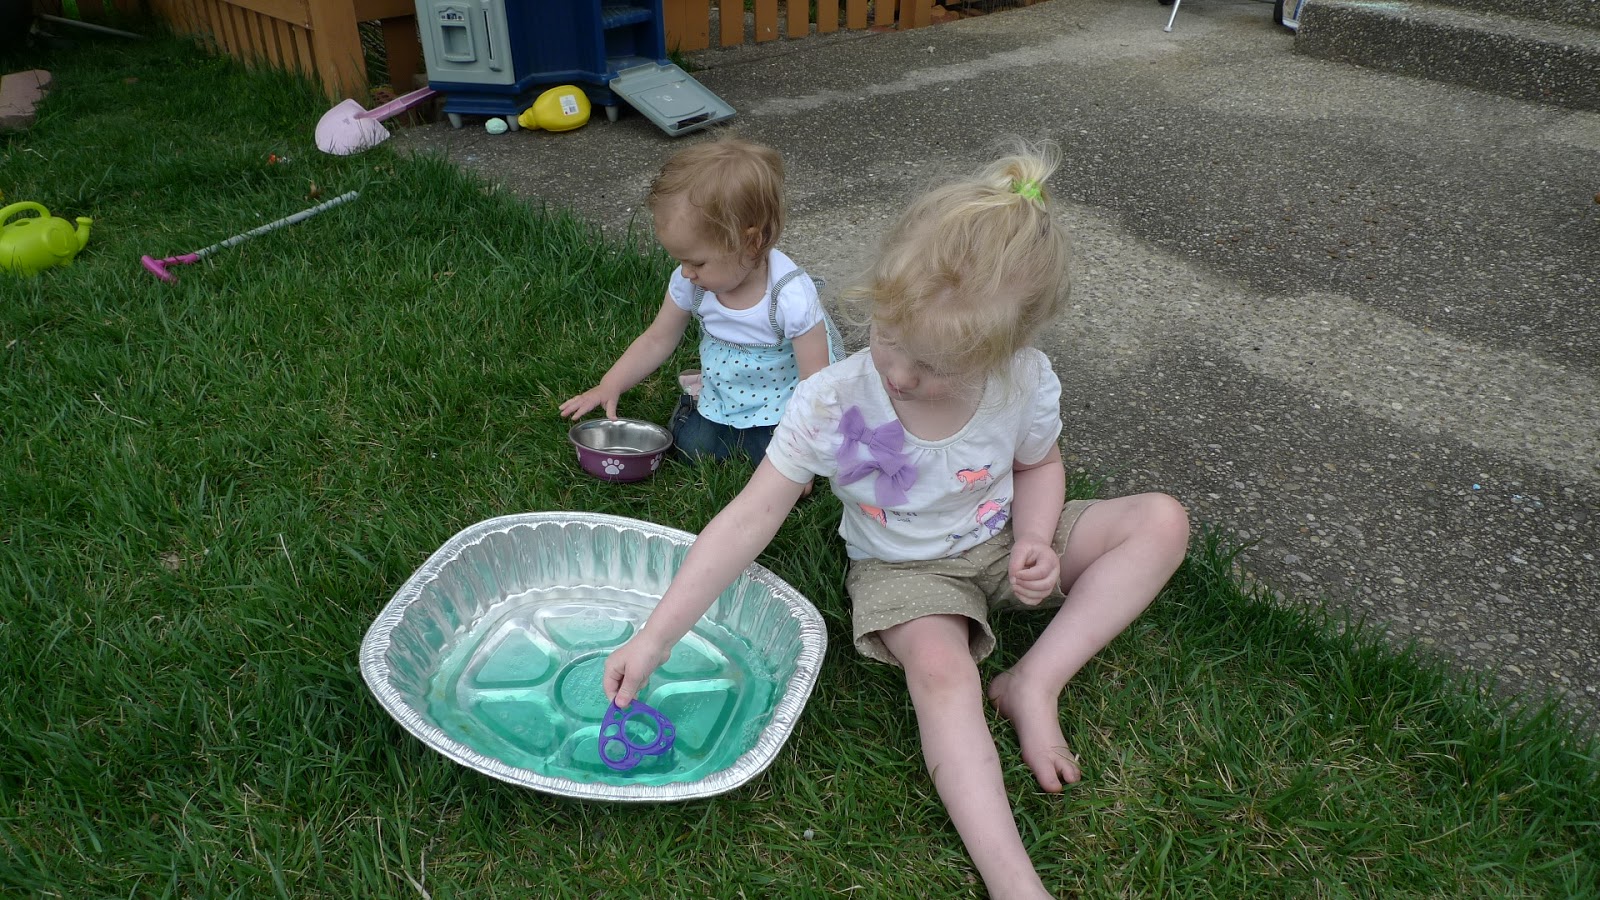
This first week we tried out these "Bouncing Bubbles" since my girls are prime bubble age. They love to chase them around the yard, so this pin sounded like fun.
Here is a direct link to the site with the recipe.
I had to triple the recipe to make enough to fill up the bottom of this roasting pan. The directions say they work better if the solution sits overnight- I found they didn't work at all until the next day, since there was too much air in there from stirring it.
These bubbles did not work with a coathanger "wand". Bummer.
BUT- we found some items around the house to experiment with, and this stencil worked great, as did a traditional bubble wand.
Overall, I would give this idea an 8 because it worked, but I was really hoping to make gigantic bubbles with a wire hanger and couldn't. If you have a recipe that would work better for that, please share!!!
Thanks and stay tuned for my next outdoor play activity!


Wednesday, April 10, 2013
A Nice-Weather Goal
Okay, I'm putting this goal out there publicly, so now I have to do it!
I want to do a special project with my kids outdoors at least once per week. Pinterest will be so helpful for this! I have so many fun ideas pinned, and I want to actually DO them, haha!
Up first? A super bouncing bubble recipe. Stay tuned- I will take photos and write a review of the pin.
Make sure you follow me on Pinterest too so you can see some of the fun things I pin!
Enjoy this nice weather :)
I want to do a special project with my kids outdoors at least once per week. Pinterest will be so helpful for this! I have so many fun ideas pinned, and I want to actually DO them, haha!
Up first? A super bouncing bubble recipe. Stay tuned- I will take photos and write a review of the pin.
Make sure you follow me on Pinterest too so you can see some of the fun things I pin!
Enjoy this nice weather :)
Monday, April 1, 2013
My version of "Broccomole"

So, is it just me, or is Broccomole taking over Pinterest? I thought I'd throw my own recipe into the mix, since I don't care for the others out there. Its nutritious, delicious, and pretty!
What you'll need:
-Food processor or really good blender
-4 Cups of fresh chopped broccoli
-1 large onion, sliced
-2-4 cloves of garlic (what you prefer)
-1 block of neufchatel or lowfat cream cheese
- 1/2 cup of plain greek yogurt
-Salt and pepper to taste
-Olive oil to preferred texture
This will make a large portion (about 7 cups!)- I kept half in my fridge and froze the other half for another time! Its so low fat that you can eat a bunch!
Directions:
-Toss the onion, garlic cloves, and broccoli in some olive oil and roast in over at 400 degrees F for about 1/2 hour (until browned and soft)
-When you remove from oven, toss it all in the food processor and blend well. Add some of the olive oil to help it process.
-Add in the block of cream cheese and yogurt and blend well.
-Blend in salt and pepper to taste. Add more olive oil if you want it "looser".
THAT'S IT!!!

I love this version I made, because it is a great dip, as well as a good pasta sauce too! It is tasty warm, but you can scoop it cold out of the fridge too :)
I hope you enjoy my version of this tasty dip!
Thursday, March 28, 2013
Easter Basket stuffers round-up
It's almost Easter- a time for those of us who are Christian to remember Jesus rising from the grave after dying on the cross. Of course, in our culture Easter has also become a time for bunnies and baskets, dresses and hats, candy and eggs...a hodge-podge of Springy goodness. As kids, we always had a great time hunting down our baskets in the house, and seeing what kind of note the bunny left us. We always had the Robin's Eggs candy, Jelly Beans, and a chocolate bunny along with some kinds of special gift.
For my kids, I do the same! Last year as a 2 year old, Lola Jane really got into it. This year, I think both of my girls will have a blast. (Although I had some explaining to do when LJ found the requested Care Bears in the back of my van the other day...I had to make up a story quick!)
I thought I would put together some fun and affordable basket stuffer ideas for those of you are wanting some inspiration or are not sure what to put in a basket for a very young child. Here are 50 ideas!
 1. A new little ball
2. A book (Target has cute board books for $1, or hit the Christian bookstore for an Easter book!)
3. A photo of the family pet wearing bunny ears
4. "puff" snacks in plastic eggs
5. New flip flops or special shoes to wear with their Easter outfit (depending on what you have to spend)
6. Crayons
7. Stickers
8. Homemade toddler muffins
9. Pureed fruit pouches
10. New toddler flatwear
11. New sippy cup
12. cool panties or underwear with their favorite character
13. Cute cloth diaper cover (We shop at Toasty Baby)
14. A bible verse or a compliment written on a slip of paper inside an egg
15. Silly Putty or play dough
16. toddler-safe nail polish
17. tiny figurines (dinosaurs, ponies, etc.)
18. a jump rope
19. bubbles
20. craft paint or finger paint
21. coloring book or plain notepad
22. alphabet flash cards (the Dollar store always has these)
23. animal crackers
24. maracas
25. harmonica
26. music CD
27. glue sticks
28. pipe cleaners, googly eyes, pom-poms
29. hair things or a hat
30. New socks
31. A little purse or "treasure pouch" with something inside
32. Lacing cards (or use a hole punch to make your own out of cardboard shapes)
33. Dehydrated fruit in plastic eggs
34. felt race track pieces (will stick to carpet- make them yourself by cutting curvy shapes from black felt)
35. Wind-up toys
36. Bean bag pouches (if you sew you can make them)
37. Stuffed animal (you can get Easter-y ones at the Dollar Store)
38. mini oranges (like Cuties)
39. alphabet magnets
40. teethers
41. toothbrush
42. toothpaste
43. new shampoo or soap
44. bath toys
45. hot wheels
46. sandbox toys
47. goldfish crackers in plastic eggs
48. single serve nut butters (like nutella!)
49. hair brush or comb
50. Don't forget a note from the Easter Bunny!
I hope some of these ideas work for you if you get stuck in a rut! Have a happy Easter!
For my kids, I do the same! Last year as a 2 year old, Lola Jane really got into it. This year, I think both of my girls will have a blast. (Although I had some explaining to do when LJ found the requested Care Bears in the back of my van the other day...I had to make up a story quick!)
I thought I would put together some fun and affordable basket stuffer ideas for those of you are wanting some inspiration or are not sure what to put in a basket for a very young child. Here are 50 ideas!

2. A book (Target has cute board books for $1, or hit the Christian bookstore for an Easter book!)
3. A photo of the family pet wearing bunny ears
4. "puff" snacks in plastic eggs
5. New flip flops or special shoes to wear with their Easter outfit (depending on what you have to spend)
6. Crayons
7. Stickers
8. Homemade toddler muffins
9. Pureed fruit pouches
10. New toddler flatwear
11. New sippy cup
12. cool panties or underwear with their favorite character
13. Cute cloth diaper cover (We shop at Toasty Baby)
14. A bible verse or a compliment written on a slip of paper inside an egg
15. Silly Putty or play dough
16. toddler-safe nail polish
17. tiny figurines (dinosaurs, ponies, etc.)
18. a jump rope
19. bubbles
20. craft paint or finger paint
21. coloring book or plain notepad
22. alphabet flash cards (the Dollar store always has these)
23. animal crackers
24. maracas
25. harmonica
26. music CD
27. glue sticks
28. pipe cleaners, googly eyes, pom-poms
29. hair things or a hat
30. New socks
31. A little purse or "treasure pouch" with something inside
32. Lacing cards (or use a hole punch to make your own out of cardboard shapes)
33. Dehydrated fruit in plastic eggs
34. felt race track pieces (will stick to carpet- make them yourself by cutting curvy shapes from black felt)
35. Wind-up toys
36. Bean bag pouches (if you sew you can make them)
37. Stuffed animal (you can get Easter-y ones at the Dollar Store)
38. mini oranges (like Cuties)
39. alphabet magnets
40. teethers
41. toothbrush
42. toothpaste
43. new shampoo or soap
44. bath toys
45. hot wheels
46. sandbox toys
47. goldfish crackers in plastic eggs
48. single serve nut butters (like nutella!)
49. hair brush or comb
50. Don't forget a note from the Easter Bunny!
I hope some of these ideas work for you if you get stuck in a rut! Have a happy Easter!
Subscribe to:
Posts (Atom)