I wanted to make LJ a special outfit for her birthday. At first, I was going to go the "typical" route and make her a dress. Then I decided that she is a little bit of a tomboy too, so I settled on this adorable smocked peasant top and ruffle pants.
Her party theme is "Dinos and Dollies" so I chose the cute Michael Miller Children at Play series Doll fabric.
I didn't have a pattern that I wanted to use, so for the top I did the following to draft my own pattern.
PEASANT TOP
1. Find a pattern with a bodice you like. Cut out the back piece and its lining like normal. On the front part, add about 3 inches in the middle. Then cut out the lining WITHOUT adding the extra inches. This will allow extra fabric for the smocking on the front only.
2. Before you sew the front and back bodice, you will need to cut the big poofy sleeves! Work with the fabric folded- the fold is the top part of the sleeve. Using the bodice pattern, trace onto your fabric the armhole opening. This will ensure they match up when you sew. Leave a few extra inches up top so you can gather the top part with elastic. This creates the poofiness at the shoulder! Make your sleeves about 3 inches longer than you think you need. This will allow for elastic casing and poof factor.
3. Now use a gathering stitch on the front bodice piece. Do 6 rows of stitches along the front. Start and end going straight down from the neck. This helps keep it centered. I marked it with a pin. Gather it up until the bodice piece matches up in width with its lining. Then, using a decorative honeycomb stitch you can stitch three rows between the gathering stitches. Then remove your gather stitches. EASY!!! (If you want to hand-smock, be my guest, it would look beautiful!)
4. Before sewing the sleeves onto the bodice, you need to add the shoulder elastic. (photo below)
Just use a zig-zag or serge on the edge to prevent fraying. Then fold over just enough to make a casing for your 1/4" elastic. This piece should make it small enough to fit over your little one's shoulders. Use an existing shirt for reference (remember to account for seam allowance!) Add in your elastic and sew it down well on either end.
5. Sew your sleeves up the bottom seam then attach the sleeves onto the front and back bodice pieces. Carefully line up the elastic on either side!
6. Add in your lining, being sure to leave the bottom open.
7. Cut a panel on the fold that is about twice as wide as the bodice. You can make the length longer to be a dress, or tunic length like I did. Sew it up the back, then do a gathering stitch along the top. Gather it up until it will fit the bodice. Sew it to the front of the bodice.
8. Fold under the bodice lining to cover the seam allowance from the skirt/front bodice. Then pin a LOT and stitch in the ditch on the front to attach. Flip over to be sure that the lining is all attached!
9. Hem the bottom as normal, or add a decorative stitch like I did. You could also add elastic at the bottom if you want to make a bubble shirt!
10. Zig-zag stitch or serge along the edge of the sleeves. Then fold over to make a casing for 1/4" elastic. The elastic should fit just right around the wrist of your little one. Add in the elastic, and you're done!!!
PANTS
1. I used the kid pants pattern from MADE- it's free! For fabric I used a corduroy with no stripes- its more like velvet! Then I used a plain pink and the same Michael Miller fabric for the ruffles.
2. To make into ruffle pants, simply cut off the pattern about 6.5" from the bottom. Sew the pants on the outside seam only for now.
3. Make strips of fabric (on the fold) that will be about 3x the width of your pants. The bottom color should be about 5.5" (11" total, since cutting on fold). The top one should be about 4.5".
4. Sew the top and bottom ruffles together with a ruffle stitch. Gather up to fit the pants, then sew onto the bottom hem of the pants. (This is much easier than sewing on completed pants since it lays flat.
5. Very carefully line up the ruffles and pin before sewing the inside seam of the pants.
6. Then sew the crotch seam, make the casing on the top, and insert elastic.
All done!!!
Now all you have to do is chase your toddler around and try to get a good picture!!!
Living life as a Christian, Single, Stay at Home Mama to two girls...and being creative along the way... Sewing, cooking, crafting and more!
Wednesday, November 2, 2011
Monday, October 24, 2011
Dirty Laundry
How do you wash your laundry? I have found that this is a controversial topic for some. We choose to go the non-scented, fewest additives possible route at our house. No fabric softener here! We also have special needs because we use cloth diapers. I do keep bleach up high in a cabinet for those times you just need it, but we use it rarely. Here is a run-down of my laundry essentials.
1. Stain Removal
I know some love their Oxyclean, etc., but we rely on the good old fashioned Fels-Naptha bar. My Grandma has always kept this handy, as well as my mom. Now I do! I just get the stain wet and rub the bar directly on it, but sometimes you need an old toothbrush to really work it in there. Then wash, and voila! My friend Kristin uses Fels-Naptha to make her own laundry detergent, but I am too lazy to do that, haha! Here is a tutorial if you want to try it.
2. Cloth Diapers
For cloth diapers, it is important to use a soap that will not irritate your baby's skin, will not leave residue in the cloth, will rinse out really well, will not react with urine, etc. There are several options out there and I have tried a lot of them. We LOVE Rockin' Green. They offer three types- one for hard water, one for soft water, and one in between called "Classic Rock". We use Classic Rock and occasionally their "Funk Rock" as a refresher for our diapers. I have tried a ton of detergents for cloth diapers, and this is hands down the best. No wonder they have a cult following! It's also okay for regular laundry, but we just use it on our diapers.
3. Delicates- lingerie, wool, cashmere, etc.
For my delicate laundry, I use Charlie's Soap. This soap is also okay for cloth diapers. I like it for hand washing and it doesn't leave a scent or anything. It's an old fashioned recipe too!
4. Regular Laundry
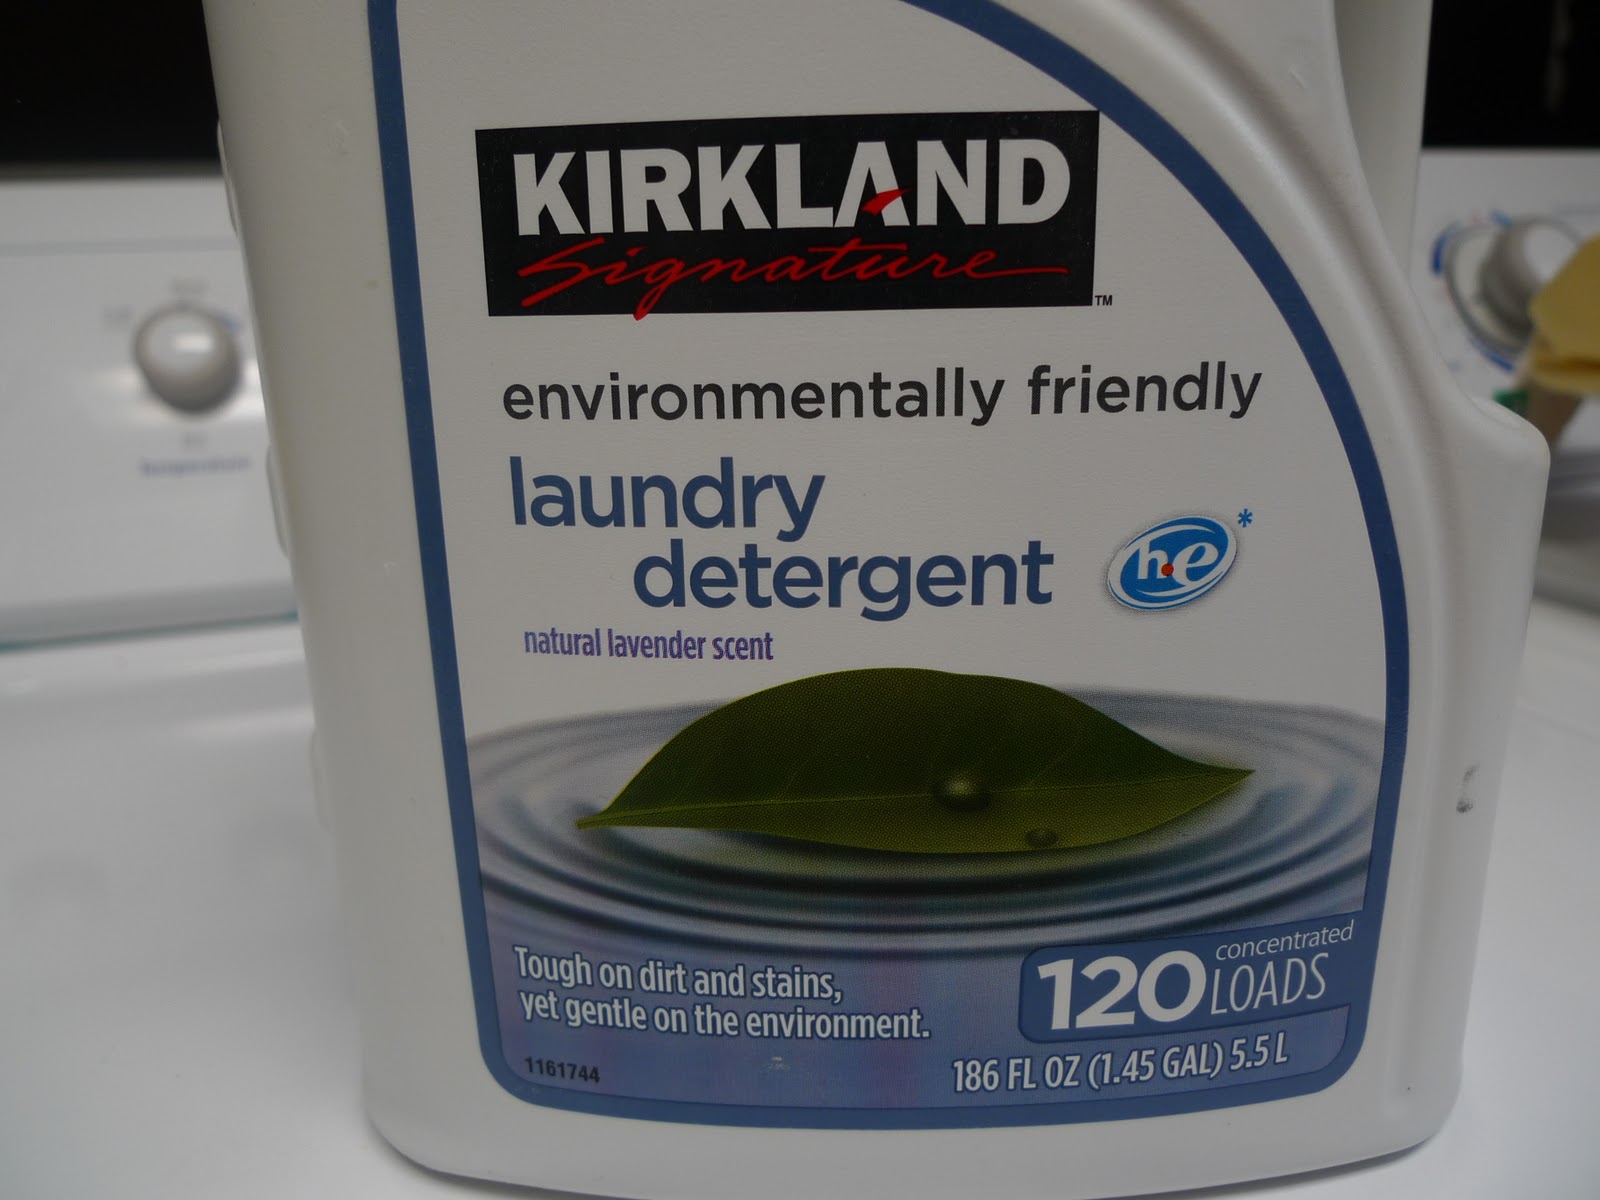
For my regular laundry (including baby clothing) I use an environmentally friendly detergent from COSTCO!!! Yes, they carry an in-house brand that is basically the same as the Seventh Generation detergent. I love it, it's unscented and perfect for baby laundry too. I just wash all our laundry together and this makes everyone happy.
And that's it! Enjoy doing your laundry today :)
1. Stain Removal
I know some love their Oxyclean, etc., but we rely on the good old fashioned Fels-Naptha bar. My Grandma has always kept this handy, as well as my mom. Now I do! I just get the stain wet and rub the bar directly on it, but sometimes you need an old toothbrush to really work it in there. Then wash, and voila! My friend Kristin uses Fels-Naptha to make her own laundry detergent, but I am too lazy to do that, haha! Here is a tutorial if you want to try it.
2. Cloth Diapers
For cloth diapers, it is important to use a soap that will not irritate your baby's skin, will not leave residue in the cloth, will rinse out really well, will not react with urine, etc. There are several options out there and I have tried a lot of them. We LOVE Rockin' Green. They offer three types- one for hard water, one for soft water, and one in between called "Classic Rock". We use Classic Rock and occasionally their "Funk Rock" as a refresher for our diapers. I have tried a ton of detergents for cloth diapers, and this is hands down the best. No wonder they have a cult following! It's also okay for regular laundry, but we just use it on our diapers.
3. Delicates- lingerie, wool, cashmere, etc.
For my delicate laundry, I use Charlie's Soap. This soap is also okay for cloth diapers. I like it for hand washing and it doesn't leave a scent or anything. It's an old fashioned recipe too!
4. Regular Laundry
For my regular laundry (including baby clothing) I use an environmentally friendly detergent from COSTCO!!! Yes, they carry an in-house brand that is basically the same as the Seventh Generation detergent. I love it, it's unscented and perfect for baby laundry too. I just wash all our laundry together and this makes everyone happy.
And that's it! Enjoy doing your laundry today :)
Tuesday, October 18, 2011
NFL themed baby outfit
I got a "commissioned" job recently- my dad's office manager needed something cute for a baby shower and asked me to make this Colts themed outfit for a baby boy. She wanted his initials incorporated, so they are on one of the burp cloths and will be on the onesie I have yet to make.
It was all pretty easy but I did custom design the pants. I used an old pair of LJ's 3-6 month pants as a guide to be sure the size was right, and they turned out great! I lined them in a super soft flannel so they would be comfy and warm. It's really easy- just make another identical pair of pants out of your lining, but turn them inside out. Then attach at the waist and bottom hem and create the waistband and hem the pants as usual. Voila, lined baby pants!
Here is the set so far:
It was all pretty easy but I did custom design the pants. I used an old pair of LJ's 3-6 month pants as a guide to be sure the size was right, and they turned out great! I lined them in a super soft flannel so they would be comfy and warm. It's really easy- just make another identical pair of pants out of your lining, but turn them inside out. Then attach at the waist and bottom hem and create the waistband and hem the pants as usual. Voila, lined baby pants!
Here is the set so far:
Thursday, October 13, 2011
Tweed Toddler "suit"
I have been making up for lost time in my sewing room. Must be the nice sewing chair my husband bought me for my birthday- it is so comfy!
LJ's 2 year old photo shoot is coming up, and I wanted her to have a really cute outfit. So when I saw this tutorial I was inspired! I wanted to make "The Audrey Cape" in a heavier fabric, but let LJ pick it out. She picked out a really pretty tweed with some gold flecks in it. There is also a hint of red and mustard.
So here is her cape, fully lined in off-white so the wooly fabric isn't itchy. Also so it looks more professional! I made my collar a little tiny- maybe should have made it a bit larger but it looks cute as is.
So then to make it an outfit or "suit" if you will, I made her a skirt. At first I was thinking pleated, but then I was like, that's a lot of tweed! So I made an elastic waist A-line skirt and broke up the tweed with a bit of Fall-colors floral canvas I had. The canvas part is important- you don't want to combine a lightweight cotton with a heavy fabric or it won't lay right. I also lined the skirt.
For hemming the bottom and making the elastic casing, I used a pink hemming ribbon. This helps with bulkier fabrics so that you don't have to roll it over twice to get rid of a raw edge. You could use a serger if you want but I like the ribbon.
And because LJ has not warmed up to modeling the outfit yet, I made David put it on (sadly, the skirt did not fit him) He was trying to convince her but it was a warm day and she didn't want to wear a cape! Little stinker.
So here is the outfit together. Hopefully she will wear it for her photo shoot, otherwise she will be in a shirt and tights only, haha!
LJ's 2 year old photo shoot is coming up, and I wanted her to have a really cute outfit. So when I saw this tutorial I was inspired! I wanted to make "The Audrey Cape" in a heavier fabric, but let LJ pick it out. She picked out a really pretty tweed with some gold flecks in it. There is also a hint of red and mustard.
So here is her cape, fully lined in off-white so the wooly fabric isn't itchy. Also so it looks more professional! I made my collar a little tiny- maybe should have made it a bit larger but it looks cute as is.
So then to make it an outfit or "suit" if you will, I made her a skirt. At first I was thinking pleated, but then I was like, that's a lot of tweed! So I made an elastic waist A-line skirt and broke up the tweed with a bit of Fall-colors floral canvas I had. The canvas part is important- you don't want to combine a lightweight cotton with a heavy fabric or it won't lay right. I also lined the skirt.
For hemming the bottom and making the elastic casing, I used a pink hemming ribbon. This helps with bulkier fabrics so that you don't have to roll it over twice to get rid of a raw edge. You could use a serger if you want but I like the ribbon.
And because LJ has not warmed up to modeling the outfit yet, I made David put it on (sadly, the skirt did not fit him) He was trying to convince her but it was a warm day and she didn't want to wear a cape! Little stinker.
So here is the outfit together. Hopefully she will wear it for her photo shoot, otherwise she will be in a shirt and tights only, haha!
Saturday, October 1, 2011
Easy-ish and Healthier Chicken and Dumplings!
I love Chicken and Dumplings. My husband, who is from Tennessee, loves "Chicken and Dumplin's". Trust me, there is a difference! I grew up eating my Granny's version, with big round balls of the biscuit dough. He grew up with the dough rolled out and cut up into strips (like the kind at Cracker Barrel). Also, mine was a little more like a thick soup, wheras in the South is is always a thicker gravy type sauce. The picture below is more like my type (I ate all of my recent batch before taking a picture, oops!)
So, here is my easy and healthier recipe- I use a big sized crock pot!
You will need:
3-4 organic chicken breasts (the non-organic ones are huge, so if using those probably 2)
2 large boxes of organic chicken stock
carrots
celery
chard
large onion
herbs de provence
1.5 cups whole wheat flour
1/4 cup (1/2 stick) butter
1/4 cup milk (approx)
1 tsp baking powder
salt
pepper
Directions:
In crock pot on high, place chicken breasts, one box of stock, carrots, onion, and celery. Stir in some herbes de provence and salt and pepper. Let this cook on high for about 3 hours then shred chicken with two forks.
Add in the other box of stock and keep crock pot on high. While this heats up, make your dumplings.
For dumplings:
Place flour, baking powder, and 1/2 tsp salt in a bowl, and add in the COLD butter in tiny cubes. Use a pastry blender or two forks to blend until the butter is rice-sized. Then add milk a little at a time until it is a nice dough. You might not need all that milk. Knead the dough then tear it into little balls, roll in your hands, and drop in the crock pot.
Clean your chard well and tear into pieces. Then drop this in the crock pot too. The chard adds some good vitamins!
Allow to simmer on high in crock pot until dumplings are cooked, usually at least an hour. Then serve! YUM!!!
(If you want to make it pretty, you can garnish with parsley like in the picture)
So, here is my easy and healthier recipe- I use a big sized crock pot!
You will need:
3-4 organic chicken breasts (the non-organic ones are huge, so if using those probably 2)
2 large boxes of organic chicken stock
carrots
celery
chard
large onion
herbs de provence
1.5 cups whole wheat flour
1/4 cup (1/2 stick) butter
1/4 cup milk (approx)
1 tsp baking powder
salt
pepper
Directions:
In crock pot on high, place chicken breasts, one box of stock, carrots, onion, and celery. Stir in some herbes de provence and salt and pepper. Let this cook on high for about 3 hours then shred chicken with two forks.
Add in the other box of stock and keep crock pot on high. While this heats up, make your dumplings.
For dumplings:
Place flour, baking powder, and 1/2 tsp salt in a bowl, and add in the COLD butter in tiny cubes. Use a pastry blender or two forks to blend until the butter is rice-sized. Then add milk a little at a time until it is a nice dough. You might not need all that milk. Knead the dough then tear it into little balls, roll in your hands, and drop in the crock pot.
Clean your chard well and tear into pieces. Then drop this in the crock pot too. The chard adds some good vitamins!
Allow to simmer on high in crock pot until dumplings are cooked, usually at least an hour. Then serve! YUM!!!
(If you want to make it pretty, you can garnish with parsley like in the picture)
Thursday, September 22, 2011
Vintage Portcard decor idea
This is a great EASY project that anyone can do! And the best part is that you can use this all year long, depending on what postcards you can find.
You will need:
-A multiple photo frame (mine is three) to fit 3x5 photos.
-Vintage postcards to fill the frame (again mine needs three)
-tape
I find my postcards at antique shops, usually for about $1-$2 a postcard. Some people ask as much as $5, which I laugh and pass up. There are a TON out there for reasonable prices, and its fun to always look through them and find a new favorite.
Just grab your three favorite, tape them into the correct spot, then put your frame back together and hang. No craft abilities required! Just remember the change it out for each season- I am guilty of having Easter postcards in at Christmastime- oops! I have postcards for Easter, Valentine's Day, Thanksgiving, and Christmas. Sometimes you can find Halloween but I have yet to find three I like.
Have fun with this, its so cute!
Wednesday, September 14, 2011
Misc. projects
I have been working a few projects here and there but I've been pretty busy lately!
I really want to have pajamas for each of my nephews and nieces done by Thanksgiving, so that is my priority. The pants are easy, but the tops take more time.
For now, I made a test pajama top for LJ out of her favorite silky fabric. It has matching silky pants too, of course! (Sorry for ugly picture)
My other new project has been to help me get back into crocheting. I haven't knit a stitch or crocheted a thing in probably 4 years or so. I really wanted to make LJ a cute Fall hat since it has started getting chilly. I will probably try again but this one turned out okay I think. I used the pattern on this blog that my cousin Julia suggested. It's on LJ's head a little crooked, but we had like 3 seconds of her patience to get a picture and the picture turned out cute at least! I like the ripple along the edge.
In other fun sewing news, my husband surprised me with a new sewing chair for my birthday. Like, its an actual sewing chair. Sounds silly, but it really is comfy and keeps your back from getting sore while you sew. So then I can sit for a while and finish the quilt I started over a year ago for my niece...
Wish me luck that I get more time to sew- I am really behind on my "Great Christmas Challenge"!
I really want to have pajamas for each of my nephews and nieces done by Thanksgiving, so that is my priority. The pants are easy, but the tops take more time.
For now, I made a test pajama top for LJ out of her favorite silky fabric. It has matching silky pants too, of course! (Sorry for ugly picture)
My other new project has been to help me get back into crocheting. I haven't knit a stitch or crocheted a thing in probably 4 years or so. I really wanted to make LJ a cute Fall hat since it has started getting chilly. I will probably try again but this one turned out okay I think. I used the pattern on this blog that my cousin Julia suggested. It's on LJ's head a little crooked, but we had like 3 seconds of her patience to get a picture and the picture turned out cute at least! I like the ripple along the edge.
In other fun sewing news, my husband surprised me with a new sewing chair for my birthday. Like, its an actual sewing chair. Sounds silly, but it really is comfy and keeps your back from getting sore while you sew. So then I can sit for a while and finish the quilt I started over a year ago for my niece...
Wish me luck that I get more time to sew- I am really behind on my "Great Christmas Challenge"!
Subscribe to:
Posts (Atom)