Thursday, January 19, 2012

1940's pattern Infant Gown!

This week at Project Run and Play the challenge was to create something from a certain decade- any you choose.  I had the perfect thing!  My hubby, er, I mean, Santa, put a vintage pattern in my stocking that actually had most of the pieces, yay!!!
It was this one from McCalls:

I decided to go with View A, a gown that has a drawstring at the bottom to keep out the chill :)
Theirs 
Mine!

The instructions were missing, but the construction was really simple.  I did the buttons and button holes first, then attached the sleeves, then sewed one long line from the sleeve edge all the way down the edge of the gown.  I did gather the neckline as in the pattern, but left off the lace- too scratchy!  Instead of gathering the wrists, I used elastic.  The pattern is copyright 1940, so I guess they didn't have it then, IMAGINE THE HORROR OF NO ELASTIC!!!

I did keep the drawstring on the bottom, even though some might say its a hazard.  By the time she can mess with it she will have outgrown the gown anyways I figured.  Plus, she won't actually sleep in this, it will be more for photos or special visitors, haha!  I used my new favorite crochet tool, the Sharp Crochet Hook.  Follow the link to check it out!  I did a picot type lace pattern all across the bottom.  This took the longest of anything on the gown, and it looks so pretty when pulled straight or gathered up with the ribbon.
Gathered up
Pulled out straight

The embroidery patterns were missing, I was so sad!  So I winged it with some cute little french knot flowers, and then a scallop down the button placket.  Nothing too wild since its for a baby.  I wanted it to be pretty simple. I may add more, but I will need to look at it and think about it!  Comment and let me know what you think! 
French knot flowers
Scalloped placket
My 92 year old Grandma gave me her sewing notions when her Macular Degeneration made it too hard for her to see well enough to use everything.  So I dug through the embroidery thread and found the oldest ones I could find- they might be older or newer than 1940, who knows!  But I bet they are close!
I hope my little girl feels special someday when she hold this gown in her hands and understands its ties to Daddy, Mommy, and Great-Grandma.  It really is something special!  

Don't forget to become a follower!  I am only a few more away from my current goal and then will do another giveaway!!!


Monday, January 16, 2012

Pear and Parm Chop Salad Recipe

When David and I were getting ready to go to Italy on our Honeymoon, we took Italian lessons.  It was so much fun- we learned some language, culture, and a few great recipes!  One of our fellow classmates was married to an Italian chef.  I mean, Italian, as in he grew up there, not in the US.  He shared a simple recipe involving just three ingredients (sliced pears, long peels of Parmesan cheese, and a drizzle of balsamic vinegar) and it has been our favorite ever since!!!
Tonight I decided to modify it by making it into a salad.  Here is what you'll need:

-About one Romaine heart, torn into tiny pieces.
-One very ripe pear, chopped into approx. 1/2" cubes
-A block of REAL Parmesan cheese (not the stuff in a plastic can, haha!)
-The best balsamic vinegar you can afford
-High quality olive oil

Basically, you just put it all in a bowl and toss.  Be sure to grate your Parmesan for this recipe.  For the olive oil, I used about 1 TBSP and for the Balsamic about 1/2 that.  But you can do it to taste.  That goes for all ingredients really!

This is an addictive salad- It's sweet and salty and oh-so-yummy!  Great for kids too, since its got fruit in it and its chopped up already.
Enjoy!

Saturday, January 14, 2012

Box Pleat Crib Skirt Tutorial!

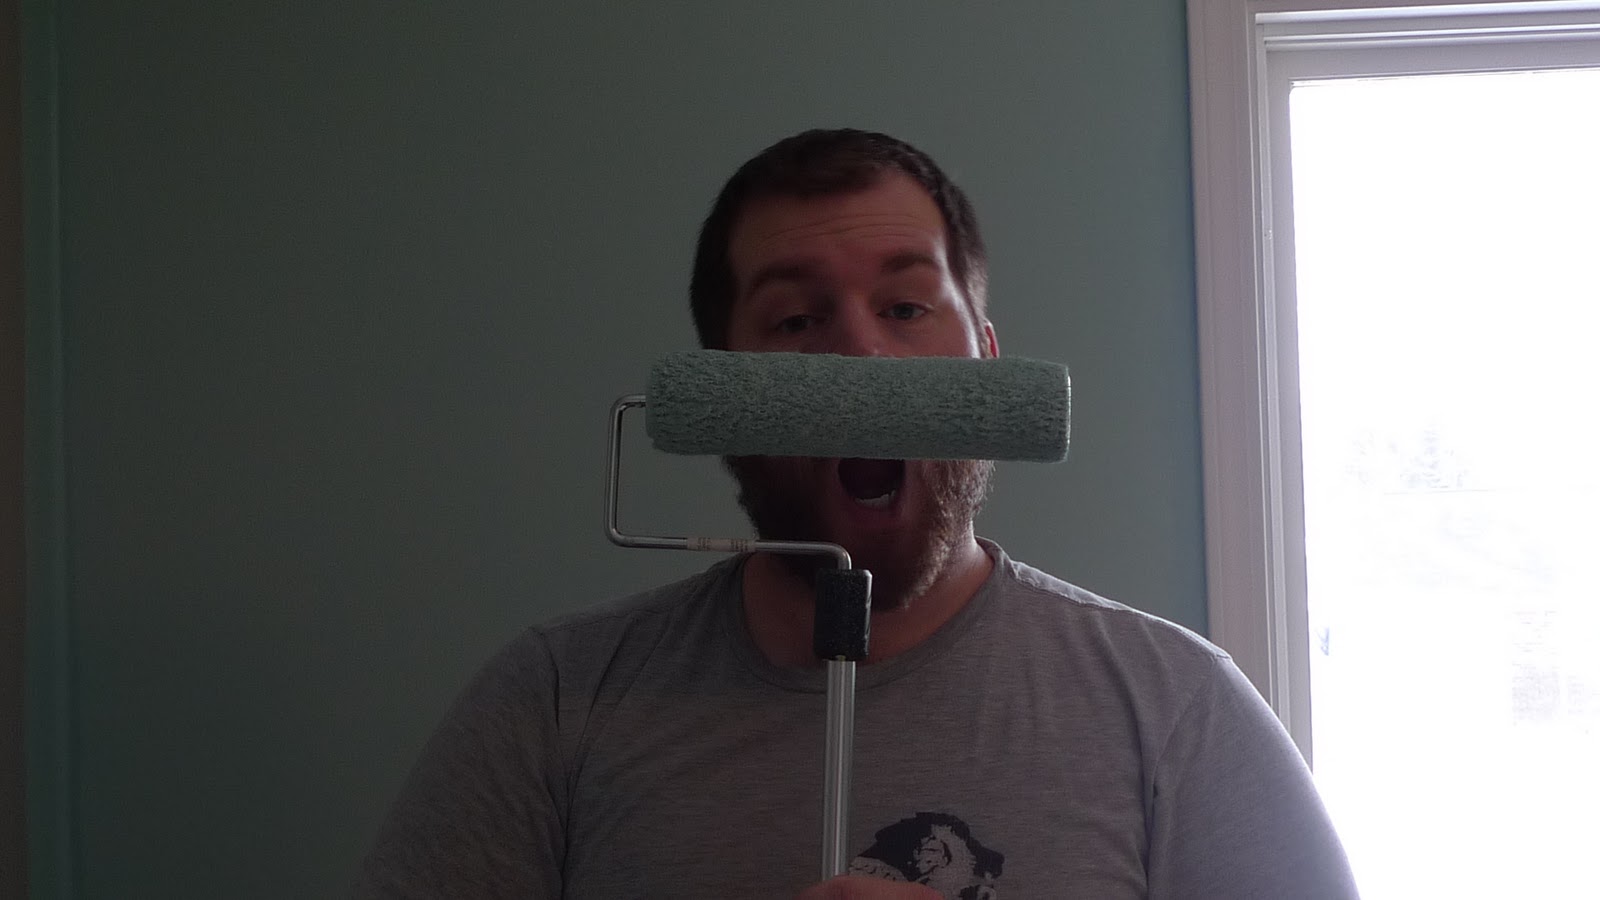
I am really cutting it close...about 5 weeks to go and I am still making things for the nursery!  David has been painting away...(and really got into posing for blog photos!)
"It looks like a mustache, right?"  "Umm...sure honey!" 

"Okay, get this action shot."
Now, I probably won't do a whole post just about paint color, so I will tell you in this post that we used this:
Behr Ultra in "Spring Stream"
This paint is great- it really does cover anything underneath and you can do one coat! It's a very close match to Tiffany Blue- which is in the fabric we chose for the room- yes, I said "we" because David was very involved in the process of choosing the fabrics.  I will use the same fabric for the window valance as I do for the crib skirt, and then I might make a pillow for the glider, and perhaps a Boppy cover...maybe even a mobile with the scraps.  So keep an eye out for future posts!
BOX PLEATED CRIB SKIRT
To make my Box Pleated Crib Skirt, you will need:
-About 1 1/2 yards of white muslin (for the part that will be under the mattress)
-About 2 yards of the main fabric (where I used the brown floral print)
-About 1 1/2 yards of the accent fabric (where I used the coral polka-dots)
-Coordinating thread (one spool should be plenty)
-Scissors, Rotary Cutter, Iron and Sewing Machine

(***ALWAYS wash, dry, and iron your fabric first!  I allowed wiggle room for shrinking in the amounts above.***)

Cut the following from your fabric (Hint:  Cotton tears really well!  For those long measurements I let 'er rip, then I used my rotary cutter to do the shorter cut.)

Muslin
-one piece 49" x 27"

Main fabric
-2 pieces 60" x 9.5"
-2 pieces 38" x9.5"

Accent fabric
-2 pieces 60" x 5"
-2 pieces 38" x 5"

Okay, now let's put all that together!!!  For this entire tutorial, use a 1/2" seam allowance.

1.  With right sides facing, attach the trim to the main fabric lengthwise. (You can use a serger if you prefer.)

2. Iron your seams nice and flat! (If you used a serger, still do this!)

3. Zig-zag (or serge)  around the perimiter of the whole piece.  Do this as close to the edge as possible.

4. Mitre the bottom corners of the trim following the steps in the photos below.
Fold corner in 1/2" and iron down.
Fold over the bottom hem 1/2" and iron.
Fold in the side hem 1/2" and iron.
5.  Sew down the side and bottom hems.

 6.  Make your box pleats (one per panel) following the instructions in the photos below.  I wanted a very simple look- but if you want a series of box pleats, simply add 10" per pleat and go to town!
Find the exact center and mark with a quilting marker or fabric pencil.
Measure and mark 5" on either side of the center.
Pinch the mark on the left, and fold over so that the mark touches the center mark.  Be sure its lined up perfectly all the way to the bottom hem then iron.  Repeat for the other side.
Pin, then baste in place 1/4" from the edge.
7. Attach the panels to the muslin and iron seams flat.


And you're done!  Enjoy making your little one's nursery as special and unique as they are...and come back for more nursery projects that are in the works (or at least in my head!!!)  To see all the projects in their completely final form (like this on the crib) keep coming by- I will do a "reveal" post when the nursery is complete!

***Please remember that this tutorial is my original work.  It is intended for personal use only.  Feel free to link directly to this post but please do not copy it.  THANKS!!!***

Remember to become a follower- I will do another giveaway when I reach my current goal!!!

Friday, January 13, 2012

...and we have a WINNER!

We have a winner for my first ever giveaway!!!  I wish more than 13 had entered since I am almost over 40 followers (counting Google connect and RSS feed subscribers!)  Oh well, they missed out!

I used the random number generator at Random.org to choose the winner for me...and it chose comment #5!
Number five was Vicki who wrote:

Vicki will be getting a custom made tote/purse sent to her!  I will do another giveaway when I get to 50 followers- which is only 10 followers away, eek!  So spread the word to your crafty-sewy-foodie friends that they should come over here for a visit and become a follower for a chance to WIN!!!

Thursday, January 12, 2012

Toddler Boy's Hawaiian Shirt- from a men's XL!

I am participating in the fun sew-along at Project Run and Play.  It is so much fun to see what everyone comes up with!  Some of my competitors are just fabulous in the sewing room and with the camera, so it is a little intimidating...but I am still going to give it a shot every week!
Tommy in his new shirt- he even brought an accessory!
 This week's challenge is to make Boy's clothing.  I don't have a son, but I have plenty of nephews, and one happens to live not too far away.  It didn't take long for me to get inspired- my husband and I were getting a box together for Goodwill when I saw him toss in a hideous Hawaiian shirt from a Magnum P.I. themed party we attended last summer.  My brother LOVES hideous Hawaiian shirts, so I could have given it to him, but instead I decided to use it for this challenge and re-purpose it for his son Tommy.
No outdoor photos today, buddy- we got our first big snow!
I think it turned out pretty cute!  It actually took me less time than you might think- I used the existing button holes, bottom hems, collar, and sleeve hems.  To do this, just grab any boy's shirt pattern you have (I used a pajama pattern for a looser Hawaiian-y fit) then line up the pieces where the part is on the big shirt you want to use.  Remember that you won't need your hem allowances or placket parts, etc., so move over your pattern accordingly. 
The center back seam of the collar- doesn't look bad at all, and saves a lot of time!!!
The collar was super easy too- I just cut it down the center, removed several inches to fit, and attached to the top of the shirt.

It really was amazing how easy this was, I will have to make Tommy more shirts in the future!
I really love this shirt!
No, for real, I mean it.

I did make his shorts too...they were out of an old pair of my husband's khakis.  I think I'd like to do a more formal tutorial on this so I will leave out those instructions for now.  By reusing all pockets, they sure are cute and easy, but more complicated than the shirt.

Wednesday, January 11, 2012

Candy/Toy Packet Handmade Valentines- FREE PRINTABLES!

This girl loves boots!

 I wanted to come up with something fun for LJ's Mother's Day out class for Valentines Day.  I loved Valentines Day as a kid- it was such an exciting day!  At my school we always made hand decorated bags to put on the back of our chair for everyone to put a treat in.  That was the 80's, the good 'ole days where you didn't HAVE to give a Valentine to everyone in the class, only who you wanted to...but I never remember anyone not giving it to everybody.   I DO remember this little blonde kid named Steven who made me "roses" with a red pencil and his hand-held sharpener.  I kept those in my desk all year long!  Ah, my first Valentines Day roses.
Now as an adult, I still think the kids stuff is more fun.  I mean, I want my husband to do something...but I really care more about him loving me all year long rather than buying me some chocolate and roses on this one day, you know what I mean?


So, here is what I came up with for LJ's class- packets that you print, decorate, then attach with whatever method works for you- hand sewing with embroidery thread, machine sewing, or even stapling!  You can print on whatever you choose- regular printer paper, construction paper, old paper grocery bags...whatever floats your boat, okay?

Simply print using the links below, then cut them out.

  Let your little one go to town decorating them.

Then attach with your chosen method leaving a hole to insert candy, tiny toys, even a cookie!
Here is what's in ours:
plastic dollar store "clappers"

stickers 
...and some chocolate.  I gave in, since its kinda a chocolate-y holiday!

I used colorful embroidery thread to attach ours.  NOTE: Try not to overfill or you will have a hard time attaching them!


  Then shut the hole.

Voila, you are done!  Much cuter than those flimsy paper Valentine's with the envelope that will NEVER stay closed, haha!  Of course if your kids are older their decor skills will be better!  You could give them bits of lace, sequins, whatever you want.  I try not to be a control freak about projects like this.  I feel like it builds LJ's confidence for me to let her do things her way and not "fix" them or tell her what to do.  Could I make a prettier Valentine?  Sure, but I am an adult...and these are from her, not me!

Enjoy!  And please use these for personal use only (not that I think any of you will be impressed with my "artwork").  Let me know if you have any problems with the files- its my first time sharing a printable!  Suggestions are appreciated if you know of a better way!

Click HERE for "Valentine, You're a HOOT!"
Click HERE for "Valentine, You're the cat's MEOW!"
Click HERE for "Valentine, I HEART you!"

Monday, January 9, 2012

I've reached a goal- now its GIVEAWAY time!!!

Thanks everyone for helping me reach my recent goal of 30 followers!!!  You are the BEST!  That was a fun surprise to find this morning since I've been sitting at 29 for a couple of days!  High five from LJ!  (okay, I don't blame you for not wanting to touch that messy little hand!)


So here is how to be sure you are entered into the giveaway (because there are some followers subscribed in a way other than Google so I don't know who they are!)

Just leave a comment below telling me that you are a follower or subscribed- yup, that simple.  The winner will be randomly chosen from the list of comments.
***This giveaway is now closed.***
The prize will be a tote/purse sewn by me especially for YOU!

Good luck, and thanks again for being a follower.  My next goal is 50 followers, so please help me get there are we will do another giveaway!